Running the Analysis
In this article:
This article provides a step-by-step guide on how to run a semen analysis using your Ongo Vision device and the Ongo Vision App.
Device and App Setup
- Ensure the Ongo Vision device is powered on and connected to your Android or Windows device.
- Open the Ongo Vision App and verify that all settings, including species and IDs, are correctly adjusted.
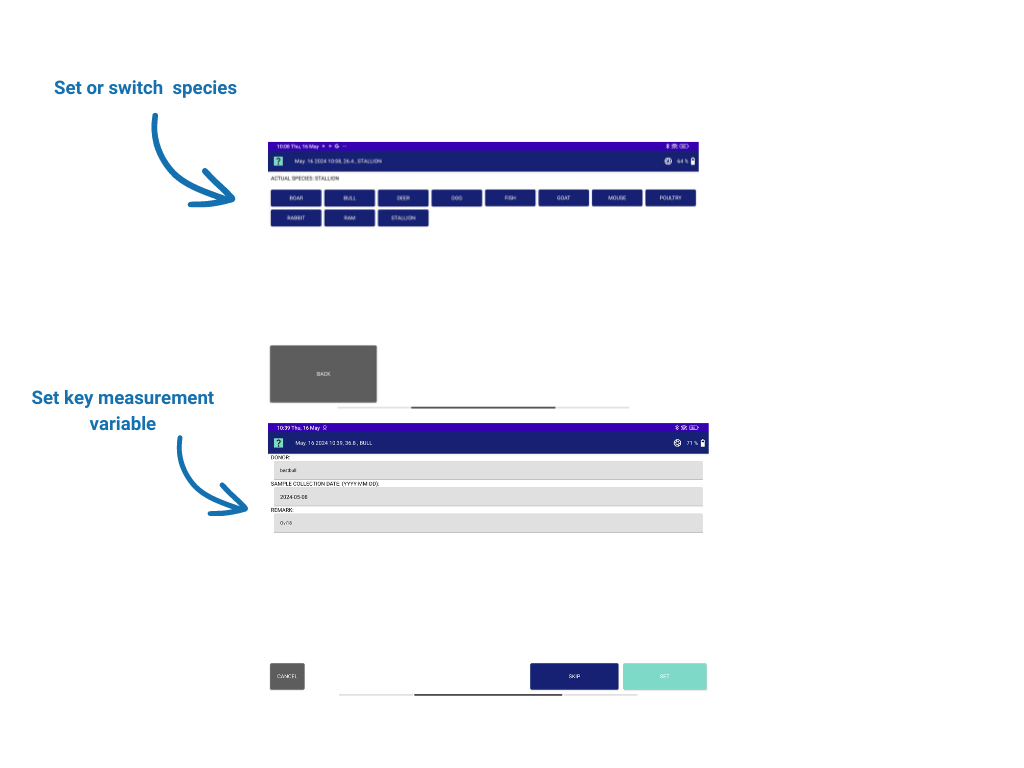
Sample Loading
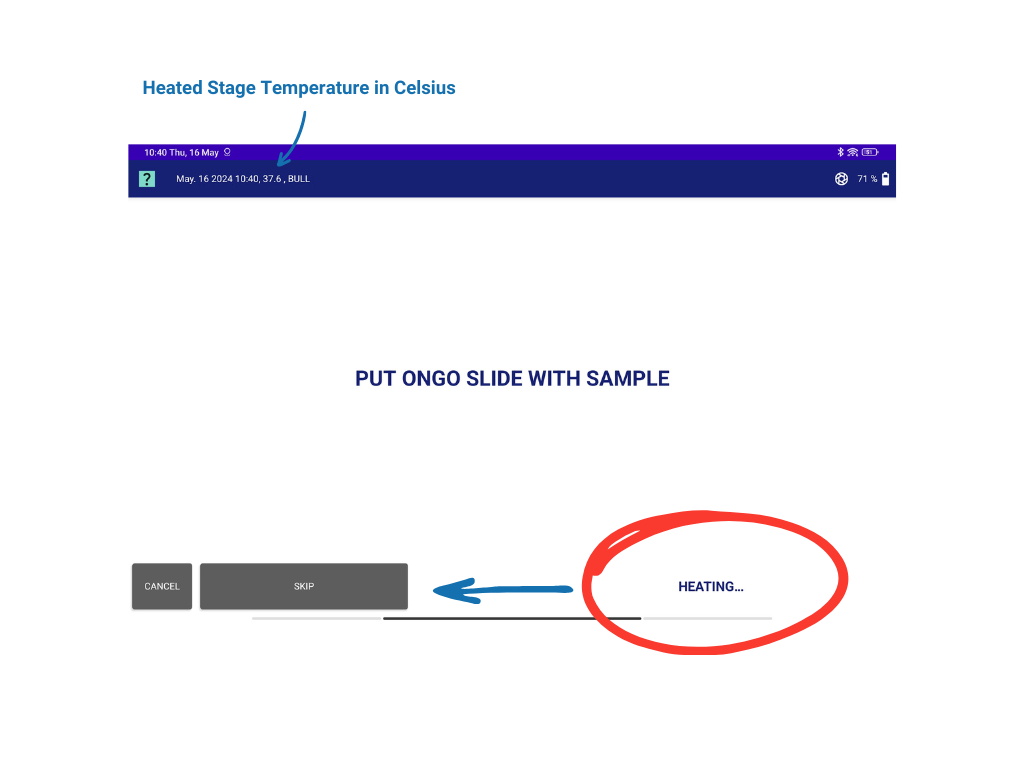
- Place the Ongo Slide with the prepared semen sample on the heated stage, ensuring proper alignment.
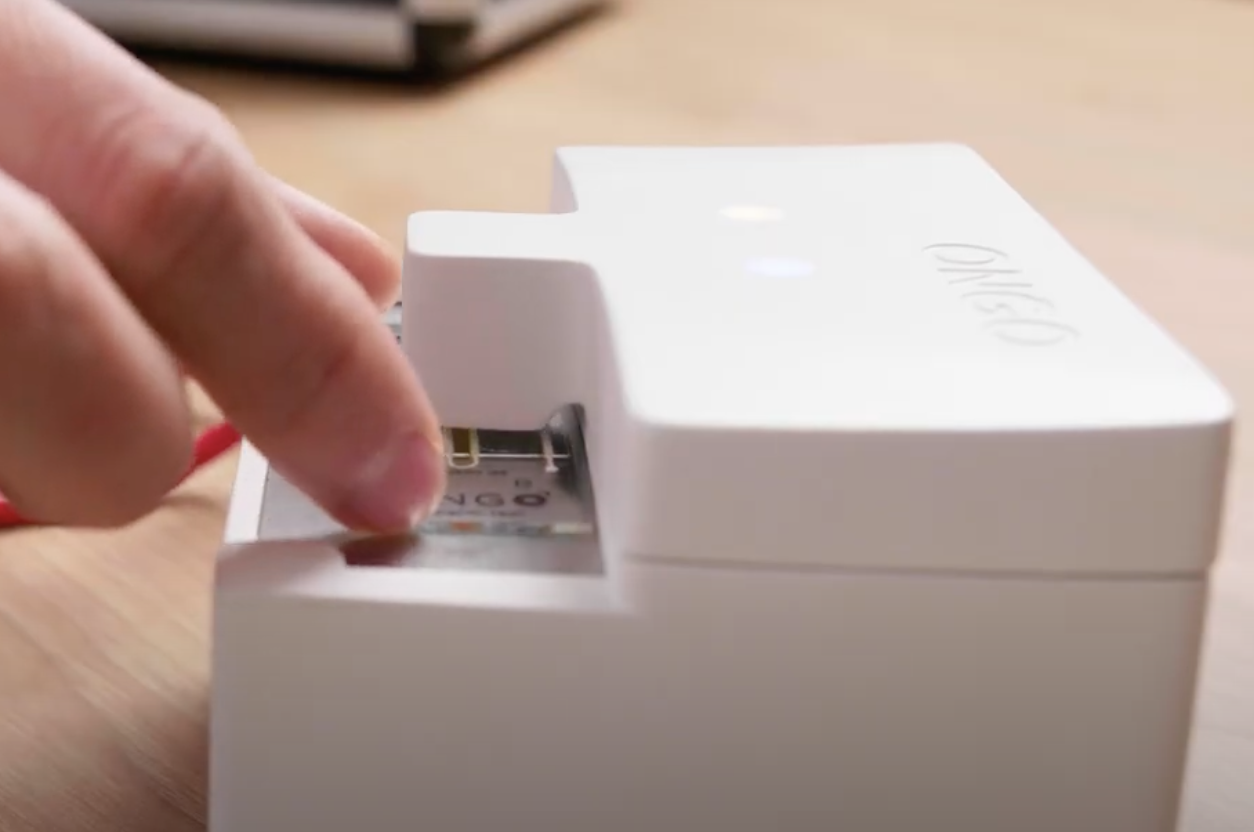
- The app will prompt you to confirm the use of an authentic Ongo Slide, which is essential for accurate analysis.
- Initiate the analysis by pressing "Start" in the app.
Temperature Monitoring
- The app's left upper corner displays the heating stage's temperature, allowing real-time monitoring to ensure ideal analysis conditions.
- Wait for the heating stage to reach the preset temperature for analysis readiness, indicated by a live view mode.
- Note: Skipping heating is possible but not advised, as correct temperature is crucial for accurate semen analysis, reflecting natural conditions for sperm assessment.
Starting the Analysis
The device will automatically focus on the sample, seeking clear black dark sperm views against the background for precise assessment.

Ongo Vision Autofocus You can fine-tune focus and illumination for better contrast, using controls to adjust image sharpness and light intensity, similar to traditional microscopy techniques.

Ongo Vision Live View Adjustments - CAUTION: To achieve the best accuracy, ensure the contrast between the sperm and background is the sharpest, ideally with the sperm appearing black against a grey background.


Scanning the Chamber
- Use the live view to scan the chamber for a suitable field of view.
- Slide the chamber to view various sections, aiming to find the most representative semen quality area.
- Use pinch zoom on your device to closely inspect sperm morphology.
- Choose a field that best depicts the sample, ensuring image clarity and contrast are optimal.
Initiating Analysis
- Once you have identified the optimal field of view, press "Continue" to begin video capture and analysis.
-

Ongo Vision Analysis in Progress The app will provide on-screen confirmation that the analysis has begun.
- During this phase, Ongo Vision's real-time analysis will detail sperm motility and concentration.
- Note: Analysis duration varies by sample density; denser samples require longer analysis for accurate data capture.

Repeating Measurements
Depending on the initial results, you may choose to "Drop & Repeat" or "Save & Repeat" the measurement for enhanced accuracy.

Ongo Vision repeating measurement - Aim for a cumulative cell count of around one thousand for the most reliable results.

Next Steps
After completing the analysis, proceed to the Understanding the Results article for guidance on interpreting the data provided by the Ongo Vision App.
If you encounter any issues or have questions about running the analysis, please consult our Troubleshooting Guide or contact our customer support team for assistance.